
A Comprehensive Guide to Installing Windows 11
Related Articles: A Comprehensive Guide to Installing Windows 11
Introduction
With enthusiasm, let’s navigate through the intriguing topic related to A Comprehensive Guide to Installing Windows 11. Let’s weave interesting information and offer fresh perspectives to the readers.
Table of Content
- 1 Related Articles: A Comprehensive Guide to Installing Windows 11
- 2 Introduction
- 3 A Comprehensive Guide to Installing Windows 11
- 3.1 Understanding the Prerequisites
- 3.2 Choosing the Installation Method
- 3.3 Preparing for Installation
- 3.4 Step-by-Step Installation Guide
- 3.5 Troubleshooting Common Installation Issues
- 3.6 Optimizing Windows 11 Performance
- 3.7 FAQs on Installing Windows 11
- 3.8 Tips for a Smooth Installation
- 3.9 Conclusion
- 4 Closure
A Comprehensive Guide to Installing Windows 11

Windows 11, the latest iteration of Microsoft’s flagship operating system, offers a host of enhancements and refinements designed to elevate the user experience. This guide provides a detailed overview of the installation process, outlining the necessary steps and considerations for a seamless transition.
Understanding the Prerequisites
Before embarking on the installation journey, it is crucial to ensure that the target device meets the minimum system requirements. These specifications are designed to guarantee optimal performance and compatibility with Windows 11’s features.
Essential System Requirements:
- Processor: 1 gigahertz (GHz) or faster with 2 or more cores.
- RAM: 4 gigabytes (GB) of RAM.
- Storage: 64 GB or larger storage device.
- System Firmware: UEFI, Secure Boot capable.
- TPM: Trusted Platform Module (TPM) version 2.0.
- Graphics Card: Compatible with DirectX 12 or later.
- Display: High-definition (720p) display with a minimum screen size of 9 inches.
- Internet Connectivity: Required for initial setup and updates.
Checking Compatibility:
Microsoft offers a dedicated tool to assess a device’s compatibility with Windows 11. This tool can be accessed through the official website or downloaded directly. It performs a comprehensive analysis of the hardware and software components, providing a clear indication of whether the device meets the necessary requirements.
Choosing the Installation Method
Installing Windows 11 can be accomplished through various methods, each tailored to specific scenarios.
1. Clean Installation: This method involves formatting the entire hard drive and installing Windows 11 from scratch. It is recommended for users seeking a fresh start, removing any existing data or programs.
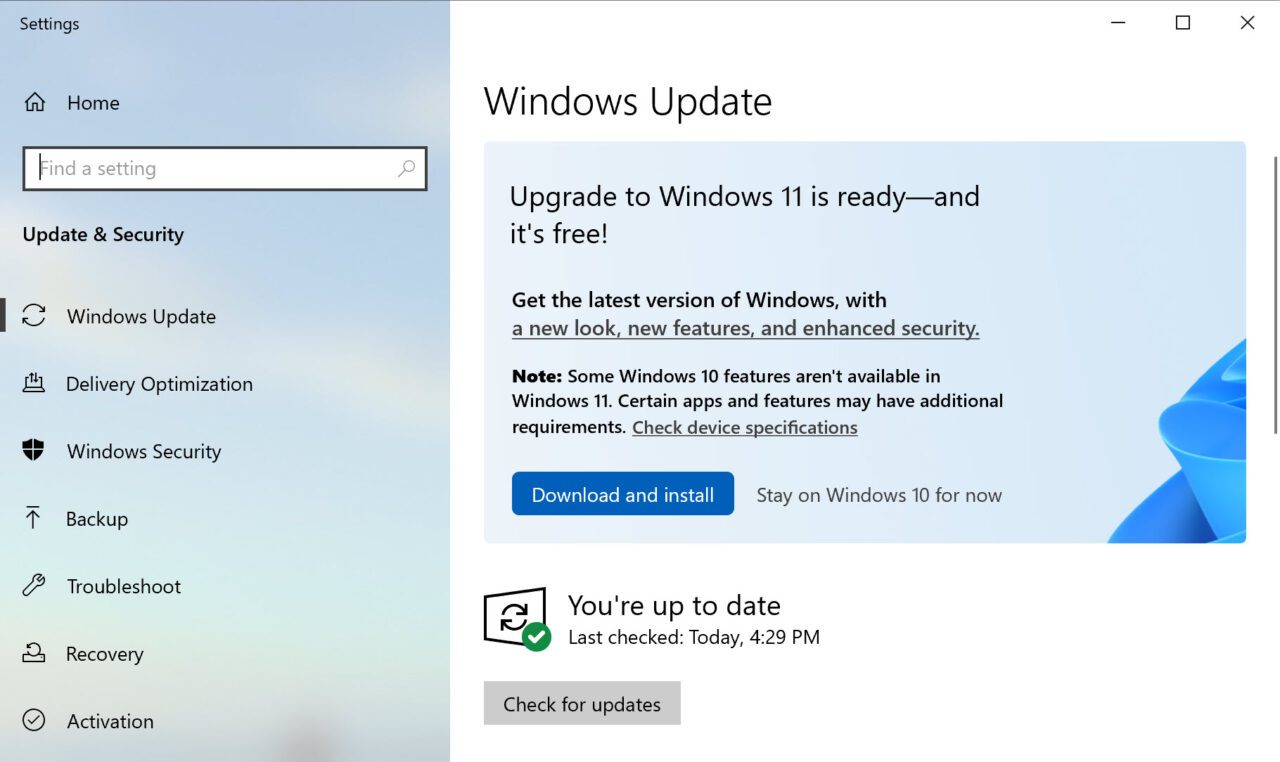
2. Upgrade Installation: This method allows users to upgrade from a previous version of Windows, typically Windows 10, while retaining their data and settings. This option provides a seamless transition, preserving the user’s familiar environment.
3. USB Installation: This method involves creating a bootable USB drive containing the Windows 11 installation files. This approach is particularly useful for installing Windows 11 on a new computer or for performing a clean installation on an existing device.
Preparing for Installation
Regardless of the chosen method, certain preparations are essential for a smooth installation process.
1. Backing Up Data: It is highly recommended to back up all critical data, such as documents, photos, and videos, before proceeding with the installation. This precaution safeguards against accidental data loss during the process.
2. Ensuring Compatibility: Verify that all essential hardware components, including peripherals and drivers, are compatible with Windows 11. This step helps avoid potential compatibility issues after installation.
3. Deactivating Antivirus Software: Temporarily disabling antivirus software during the installation process can prevent conflicts and ensure a smooth installation.
Step-by-Step Installation Guide
1. Downloading the Windows 11 Installation Files:
- Visit the official Microsoft website to download the Windows 11 ISO file.
- Select the appropriate language and edition.
- Use a reliable USB drive with at least 8 GB of free space.
2. Creating a Bootable USB Drive:
- Use a tool like Rufus or the Microsoft Media Creation Tool to create a bootable USB drive.
- Select the downloaded Windows 11 ISO file and the USB drive.
- Follow the on-screen instructions to complete the process.
3. Booting from the USB Drive:
- Restart the target device and access the boot menu.
- Select the USB drive as the boot priority.
- Follow the on-screen prompts to start the installation process.
4. Installing Windows 11:
- Select the desired language, time and currency format, keyboard layout.
- Accept the license terms and conditions.
- Choose the "Custom: Install Windows only (advanced)" option for a clean installation or "Upgrade: Install Windows and keep files, settings, and apps" for an upgrade installation.
- Select the drive where you want to install Windows 11.
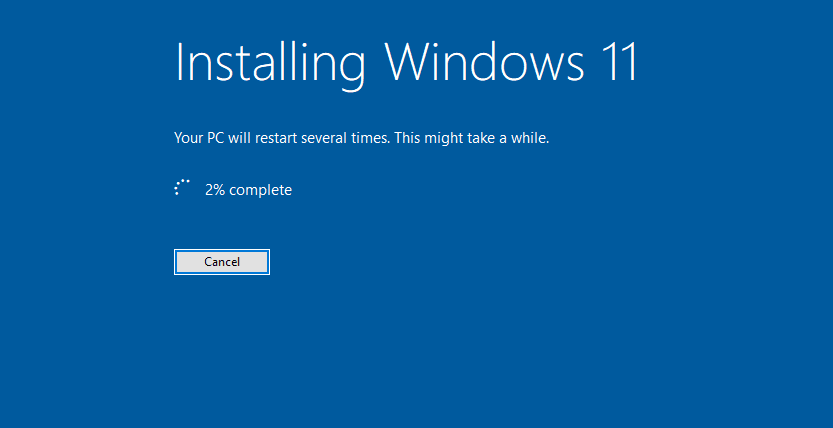
- The installation process will begin, which may take some time.
5. Completing the Installation:
- After the installation is complete, the device will restart.
- Configure basic settings, such as user accounts, network connectivity, and privacy preferences.
- Install any necessary drivers for peripherals.
Troubleshooting Common Installation Issues
While the installation process is generally straightforward, certain challenges may arise. Here are some common issues and their solutions:
- Compatibility Issues: If the device does not meet the minimum system requirements, the installation may fail. Ensure that all components meet the specifications.
- Boot Errors: Incorrect boot settings or damaged USB drive can cause boot errors. Verify the boot order and try creating a new bootable USB drive.
- Installation Errors: Installation errors can occur due to corrupted files or disk space limitations. Try downloading the ISO file again or freeing up disk space.
- Driver Issues: Missing or incompatible drivers can lead to device malfunctions after installation. Visit the manufacturer’s website to download and install the latest drivers.
Optimizing Windows 11 Performance
After a successful installation, it is essential to optimize Windows 11 for optimal performance and user experience.
1. Updating Drivers: Ensure that all drivers are up to date by visiting the manufacturer’s website or using Windows Update.
2. Disabling Unnecessary Services: Identify and disable services that are not essential for everyday use to improve system responsiveness and minimize resource consumption.
3. Managing Startup Programs: Review the list of programs that launch automatically at startup and disable those that are not required.
4. Cleaning Up Disk Space: Regularly clean up temporary files, unused programs, and unnecessary data to free up disk space and enhance performance.
5. Adjusting Power Settings: Optimize power settings to balance performance and energy consumption.
6. Personalizing Settings: Customize settings such as screen resolution, display brightness, and audio settings to personalize the user experience.
FAQs on Installing Windows 11
1. Can I install Windows 11 on an older computer?
Windows 11 has specific hardware requirements, and older computers may not meet these specifications. To determine compatibility, use the Windows 11 Compatibility Checker tool.
2. Will installing Windows 11 delete my existing data?
A clean installation will erase all data on the target drive. An upgrade installation will preserve data and settings.
3. Do I need a product key to install Windows 11?
Yes, a valid product key is required to activate Windows 11.
4. What if I encounter installation errors?
Refer to the troubleshooting section for common errors and solutions. If the problem persists, seek assistance from Microsoft support.
5. Can I downgrade to Windows 10 after installing Windows 11?
Yes, it is possible to downgrade to Windows 10 within a limited timeframe. However, this may require reinstalling Windows 10 from scratch.
6. Can I install Windows 11 on a virtual machine?
Yes, it is possible to install Windows 11 on a virtual machine. However, certain features may not function correctly.
7. How often should I update Windows 11?
Regular updates are crucial for security and performance. It is recommended to install updates as soon as they become available.
Tips for a Smooth Installation
- Back up your data: This is crucial to prevent data loss during the installation process.
- Check system requirements: Ensure that your device meets the minimum specifications.
- Use a reliable USB drive: A high-quality USB drive with sufficient space is recommended.
- Download the ISO file from a trusted source: Only use official Microsoft sources to avoid malicious software.
- Temporarily disable antivirus software: This can prevent conflicts during the installation.
- Read the on-screen instructions carefully: Follow the prompts to ensure a successful installation.
Conclusion
Installing Windows 11 can be a straightforward process with proper preparation and guidance. By understanding the prerequisites, choosing the appropriate installation method, and following the step-by-step instructions, users can seamlessly transition to the latest version of Windows. Remember to back up data, check compatibility, and optimize performance for an optimal experience. By embracing the enhancements and refinements of Windows 11, users can enjoy a more efficient, secure, and visually appealing computing environment.


Closure
Thus, we hope this article has provided valuable insights into A Comprehensive Guide to Installing Windows 11. We appreciate your attention to our article. See you in our next article!