
Navigating the "Your PC Did Not Start Correctly" Error in Windows 11: A Comprehensive Guide
Related Articles: Navigating the "Your PC Did Not Start Correctly" Error in Windows 11: A Comprehensive Guide
Introduction
With enthusiasm, let’s navigate through the intriguing topic related to Navigating the "Your PC Did Not Start Correctly" Error in Windows 11: A Comprehensive Guide. Let’s weave interesting information and offer fresh perspectives to the readers.
Table of Content
Navigating the "Your PC Did Not Start Correctly" Error in Windows 11: A Comprehensive Guide
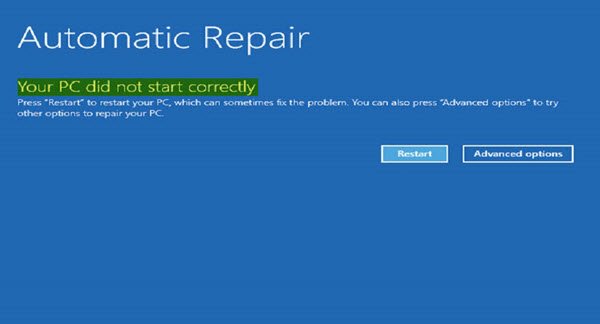
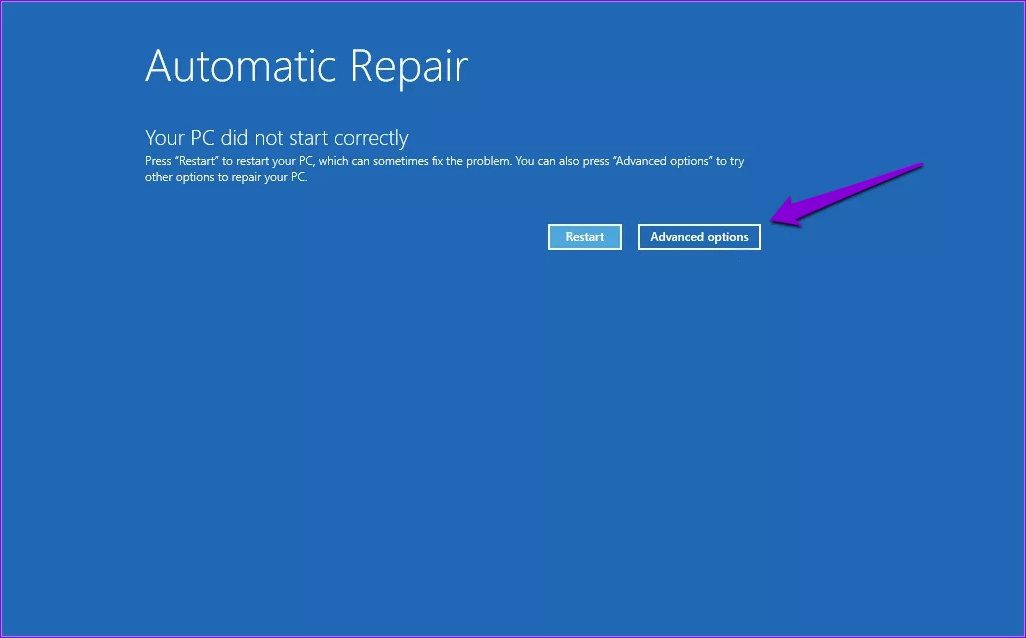
Encountering the dreaded "Your PC did not start correctly" error in Windows 11 can be a frustrating experience, leaving users stranded and unable to access their data or perform essential tasks. This error message, often accompanied by a blue screen with an error code, signifies a fundamental issue preventing the operating system from loading properly. While the cause of this problem can be multifaceted, understanding the underlying factors and available solutions is crucial for restoring functionality and minimizing downtime.
Delving into the Roots of the Problem:
The "Your PC did not start correctly" error can stem from a wide range of issues, including:
- Hardware Malfunctions: Faulty RAM modules, a failing hard drive, or a malfunctioning motherboard can disrupt the boot process and trigger the error.
- Software Conflicts: Incompatible drivers, corrupted system files, or conflicting software applications can hinder the operating system’s ability to load.
- Boot Sector Issues: Damage to the Master Boot Record (MBR) or Boot Configuration Data (BCD) can prevent the system from locating the operating system files.
- Virus or Malware Infections: Malicious software can corrupt system files, modify boot settings, or even prevent the operating system from starting.
- Overheating: Excessive heat can damage hardware components, leading to instability and boot failures.
- Improper BIOS Settings: Incorrect BIOS configurations, such as outdated settings or incompatible boot options, can interfere with the boot process.
Diagnosing the Problem:
Before diving into potential solutions, it is essential to identify the root cause of the error. This can be achieved through a systematic approach:
- Check for Hardware Issues: Examine the physical components of the computer, paying attention to any loose connections, damaged cables, or signs of overheating.
- Test RAM Modules: Run a memory test to rule out faulty RAM as a potential culprit.
- Boot into Safe Mode: Attempting to boot into Safe Mode can help isolate software conflicts as the operating system will load with minimal drivers and applications.
- Use System Restore: If the error occurred recently, using System Restore to revert to a previous working state might resolve the issue.
- Check for Error Messages: Pay close attention to the error code displayed on the blue screen, as it can provide valuable clues about the problem.
Troubleshooting Techniques:
Once the cause of the error has been identified, various troubleshooting techniques can be employed to restore functionality.
1. Resolving Hardware Issues:
- Replace Faulty Components: If a faulty RAM module, hard drive, or other hardware component is identified, replacing it with a functional replacement is essential.
- Check Connections: Ensure all cables and connections are secure and free from damage.
- Improve Cooling: Ensure adequate airflow and ventilation within the computer case to prevent overheating.
2. Addressing Software Conflicts:
- Boot into Safe Mode: Identify and disable conflicting applications or drivers that might be causing the error.
- Run a System Scan: Utilize Windows’ built-in tools or third-party antivirus software to scan for and remove malware.
- Reinstall Drivers: Update or reinstall outdated or corrupted drivers, focusing on essential components like graphics cards and network adapters.
3. Repairing Boot Sector Issues:
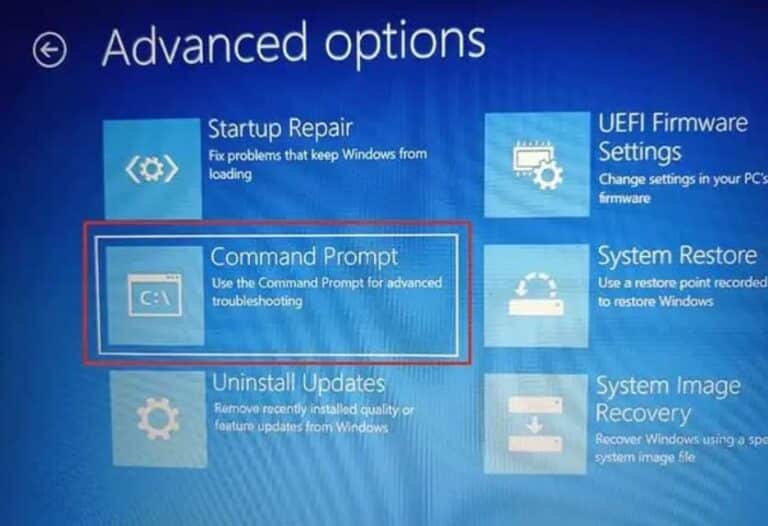
- Use the Windows Recovery Environment: Access the Recovery Environment using the "Advanced Startup Options" menu and utilize the "Startup Repair" or "Command Prompt" tools to repair boot sector issues.
- Rebuild the BCD: Use the "bcdedit" command in the Command Prompt to rebuild the Boot Configuration Data.
4. Recovering from Virus or Malware Infections:
- Boot into Safe Mode with Networking: Scan for and remove malware using a reputable antivirus software.
- Perform a Clean Installation: If the infection is severe, consider performing a clean installation of Windows 11, which will erase all data and reinstall the operating system from scratch.
5. Correcting BIOS Settings:
- Reset BIOS to Defaults: Restore the BIOS settings to their factory defaults, which can resolve issues caused by incorrect configurations.
- Update BIOS: Check for and install the latest BIOS update from the manufacturer’s website.
FAQs:
- What if the "Your PC Did Not Start Correctly" error persists after trying the above solutions? If the error persists, it may be necessary to seek professional assistance from a qualified technician.
- Can I access my data if my PC won’t start? Data recovery services can assist in retrieving data from a malfunctioning hard drive, but it is crucial to avoid attempting to fix the issue yourself to prevent further damage.
- Is there a way to prevent this error from occurring in the future? Regular system maintenance, including updating drivers, running antivirus scans, and backing up data, can significantly reduce the risk of encountering this error.
Tips for Prevention:
- Perform Regular System Maintenance: Regularly scan for malware, update drivers, and optimize system performance to maintain stability.
- Back Up Data Regularly: Create regular backups of important data to prevent data loss in case of system failure.
- Monitor System Temperatures: Utilize monitoring software or hardware sensors to track system temperatures and ensure adequate cooling.
- Avoid Installing Unreliable Software: Only download and install software from trusted sources to minimize the risk of malware infections.
Conclusion:
The "Your PC Did Not Start Correctly" error in Windows 11 can be a challenging issue, but with a systematic approach and understanding of the potential causes, it can often be resolved. By carefully diagnosing the problem, employing appropriate troubleshooting techniques, and implementing preventative measures, users can minimize downtime and maintain the stability of their Windows 11 systems. Remember, if the issue persists, seeking professional assistance is always an option to ensure a successful resolution.


:max_bytes(150000):strip_icc()/001_fix-when-windows-11-wont-shut-down-5192936-90e96f00d09b481bb134dc82c72a8ac1.jpg)
Closure
Thus, we hope this article has provided valuable insights into Navigating the "Your PC Did Not Start Correctly" Error in Windows 11: A Comprehensive Guide. We thank you for taking the time to read this article. See you in our next article!