
The Crucial Role of Disk Checking at Boot: Understanding and Utilizing CHKDSK in Windows
Related Articles: The Crucial Role of Disk Checking at Boot: Understanding and Utilizing CHKDSK in Windows
Introduction
With great pleasure, we will explore the intriguing topic related to The Crucial Role of Disk Checking at Boot: Understanding and Utilizing CHKDSK in Windows. Let’s weave interesting information and offer fresh perspectives to the readers.
Table of Content
- 1 Related Articles: The Crucial Role of Disk Checking at Boot: Understanding and Utilizing CHKDSK in Windows
- 2 Introduction
- 3 The Crucial Role of Disk Checking at Boot: Understanding and Utilizing CHKDSK in Windows
- 3.1 Understanding the Importance of Automatic Disk Checks
- 3.2 How CHKDSK Works at Boot
- 3.3 The Benefits of Automatic Disk Checks
- 3.4 When to Consider Manual CHKDSK
- 3.5 Understanding CHKDSK Output
- 3.6 Frequently Asked Questions (FAQs)
- 3.7 Tips for Utilizing CHKDSK Effectively
- 3.8 Conclusion
- 4 Closure
The Crucial Role of Disk Checking at Boot: Understanding and Utilizing CHKDSK in Windows
In the intricate world of computing, data integrity is paramount. Data loss can disrupt workflows, compromise critical information, and even cripple entire systems. To safeguard against such scenarios, Windows employs a powerful tool known as CHKDSK, a disk checking utility designed to scan and repair errors within the file system. While CHKDSK can be manually initiated, its automated execution during system startup plays a vital role in ensuring data consistency and system stability.
Understanding the Importance of Automatic Disk Checks
Imagine a library with millions of books, each representing a file on your computer. Over time, these books might become misplaced, damaged, or even lost. This is analogous to the potential for errors within your hard drive’s file system. These errors, often invisible to the user, can lead to various issues, including:
- Data Corruption: Files becoming unusable or corrupted, resulting in data loss or application malfunctions.
- System Instability: Frequent crashes, slow performance, or unexpected system behavior.
- Boot Errors: The inability to start the operating system due to inconsistencies in the boot sector.
To prevent these problems, Windows utilizes the CHKDSK utility to conduct regular checks on the file system, ensuring its integrity and correcting any detected errors. By performing these checks during the boot process, the system proactively identifies and addresses potential issues before they escalate into significant problems.
How CHKDSK Works at Boot
When Windows starts up, it automatically scans the hard drive for errors. This process, typically invisible to the user, involves several key steps:
- Scanning the File System: CHKDSK meticulously examines the file system, verifying the consistency of data structures and locating any inconsistencies or errors.
- Identifying Bad Sectors: The utility identifies and marks bad sectors, areas on the hard drive that are physically damaged and unable to store data reliably.
- Repairing Errors: For correctable errors, CHKDSK attempts to repair the file system, ensuring data integrity and system stability.
- Reporting Findings: Upon completion, CHKDSK provides a report detailing any detected errors, repaired issues, and the number of bad sectors found.
This automatic process, often occurring behind the scenes, safeguards the integrity of your data and ensures a smooth and reliable computing experience.
The Benefits of Automatic Disk Checks
The automated execution of CHKDSK at boot offers several key benefits:
- Proactive Error Detection: Regular checks prevent minor errors from escalating into major problems, minimizing the risk of data loss or system instability.
- Enhanced System Stability: A healthy file system contributes to a more stable and reliable computing environment, reducing crashes and improving overall performance.
- Data Integrity Protection: Regular checks ensure the integrity of your data, protecting against corruption and loss, especially for critical files and applications.
- Reduced Downtime: By addressing errors proactively, automatic disk checks minimize the need for manual intervention and potential downtime caused by file system issues.
When to Consider Manual CHKDSK
While automatic disk checks provide a crucial level of protection, there are situations where manual execution of CHKDSK is recommended:
- After Hardware Changes: Following the installation of new hardware, especially hard drives or SSDs, a manual CHKDSK can ensure the new components are correctly integrated into the file system.
- After System Errors: If you experience frequent crashes, slow performance, or other system errors, a manual CHKDSK can help identify and resolve underlying file system issues.
- After Malware Infection: A malware infection can corrupt the file system, making a manual CHKDSK essential for restoring data integrity and system stability.
- Before Major Software Updates: Running a manual CHKDSK before installing major software updates can help prevent potential conflicts and ensure a smooth installation process.
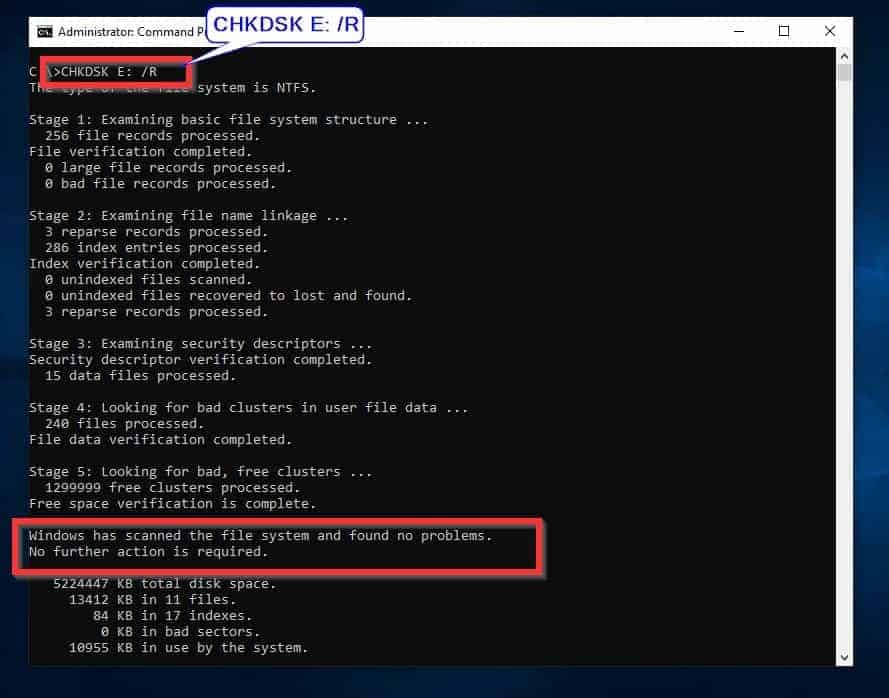
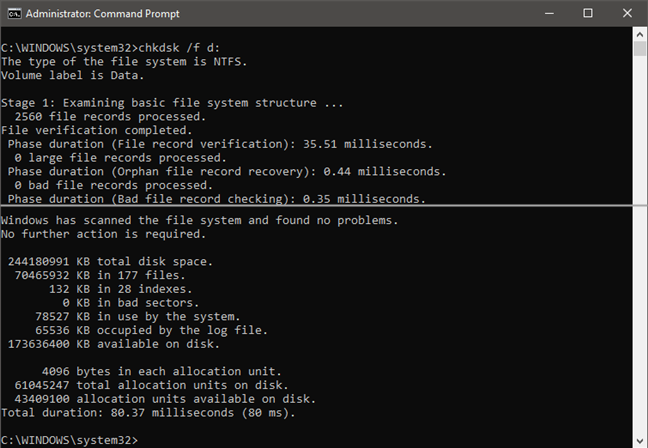
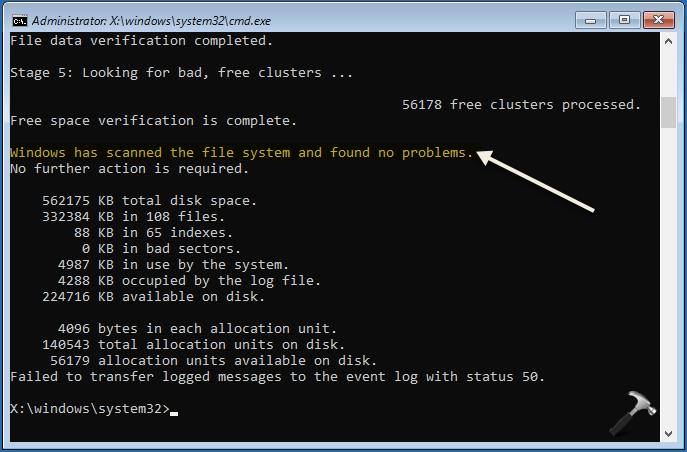
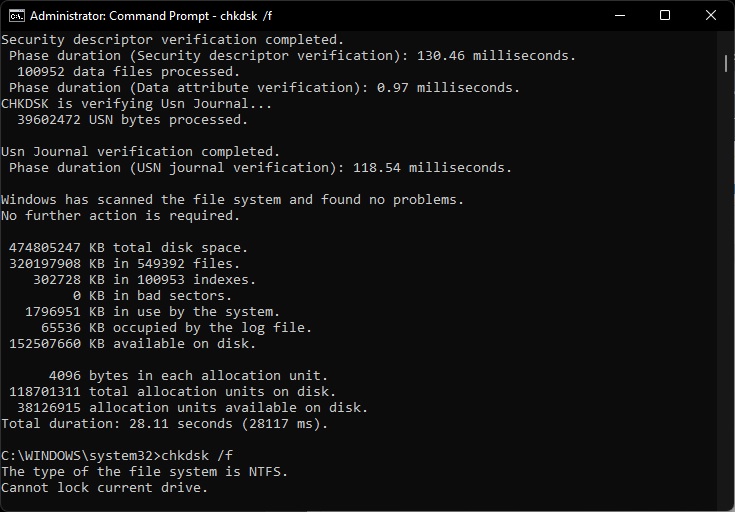
Understanding CHKDSK Output
The output of CHKDSK provides valuable information about the state of your hard drive and the actions taken during the check. Understanding this output can help you diagnose and address potential issues:
- "No errors found": This indicates a healthy file system, with no detected errors.
- "Errors found and repaired": CHKDSK successfully identified and corrected errors within the file system, restoring data integrity.
- "Errors found but not repaired": This indicates errors that CHKDSK could not fix, potentially due to physical damage to the hard drive. Further investigation and professional assistance may be required.
- "Bad sectors found": CHKDSK detected areas on the hard drive that are physically damaged and unable to store data. These sectors are marked as unusable, preventing further data corruption.
Frequently Asked Questions (FAQs)
1. How often does CHKDSK run automatically?
The frequency of automatic CHKDSK runs can vary depending on the operating system and user preferences. In general, it occurs during the boot process but may not be executed every time the system starts. The exact frequency is determined by factors like system usage, error history, and user settings.
2. Is it safe to interrupt a CHKDSK process?
Interfering with a CHKDSK process can potentially corrupt the file system, leading to data loss or system instability. It is strongly recommended to allow the process to complete without interruption. If you must interrupt, consider restarting the process later to ensure the integrity of your data.
3. Can I force CHKDSK to run at every boot?
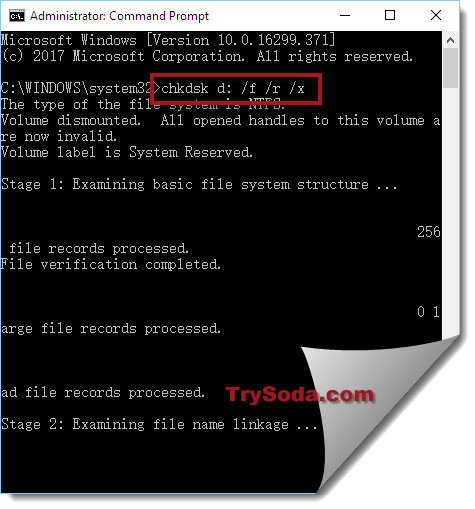
While not directly configurable, you can initiate a manual CHKDSK at every boot by using the chkdsk /f /r command in the command prompt. However, be aware that this can significantly increase boot time, especially for large hard drives.
4. What if CHKDSK finds errors but cannot repair them?
If CHKDSK identifies errors that cannot be repaired, it may indicate physical damage to the hard drive. In such cases, it’s crucial to back up your data and consider replacing the hard drive to prevent further data loss.
5. Is CHKDSK suitable for SSDs?
While CHKDSK can be used for SSDs, it’s generally recommended to avoid frequent use. SSDs have a limited number of write cycles, and excessive use of CHKDSK can potentially reduce their lifespan. However, for SSDs with detected errors, CHKDSK can be used to identify and mark bad sectors, protecting data integrity.
Tips for Utilizing CHKDSK Effectively
- Regular Maintenance: Regularly run a manual CHKDSK to proactively identify and address potential file system issues.
- Backup Your Data: Before running a CHKDSK, especially if you suspect errors or physical damage, back up your data to prevent potential loss.
- Use Appropriate Options: Familiarize yourself with the different CHKDSK options and use the appropriate ones for your specific needs. For example, /f repairs errors, while /r locates and recovers bad sectors.
- Monitor CHKDSK Output: Pay attention to the output of CHKDSK, especially error messages or warnings, to diagnose and address potential problems.
- Seek Professional Help: If you encounter persistent errors or issues that you cannot resolve yourself, consult a qualified IT professional for assistance.
Conclusion
CHKDSK, with its automated execution at boot, plays a crucial role in safeguarding the integrity of your data and ensuring the stability of your Windows system. By proactively identifying and correcting file system errors, this powerful utility prevents data loss, minimizes downtime, and contributes to a more reliable and efficient computing experience. While automatic checks provide a baseline level of protection, understanding and utilizing CHKDSK effectively can further enhance data security and system performance. By taking proactive steps to maintain the health of your hard drive and file system, you can ensure a smooth and uninterrupted computing experience.


![Chkdsk.exe Runs on Every Boot Windows 10/11? [Ultimate Fix] - MiniTool Partition Wizard](https://www.partitionwizard.com/images/uploads/2023/04/chkdsk-exe-runs-on-every-boot-thumbnail.jpg)

Closure
Thus, we hope this article has provided valuable insights into The Crucial Role of Disk Checking at Boot: Understanding and Utilizing CHKDSK in Windows. We hope you find this article informative and beneficial. See you in our next article!