
Troubleshooting Windows 11 Boot Errors: A Comprehensive Guide
Related Articles: Troubleshooting Windows 11 Boot Errors: A Comprehensive Guide
Introduction
In this auspicious occasion, we are delighted to delve into the intriguing topic related to Troubleshooting Windows 11 Boot Errors: A Comprehensive Guide. Let’s weave interesting information and offer fresh perspectives to the readers.
Table of Content
Troubleshooting Windows 11 Boot Errors: A Comprehensive Guide
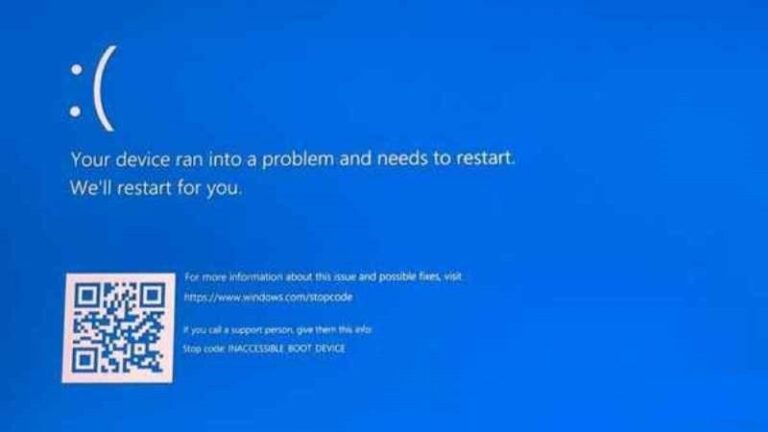
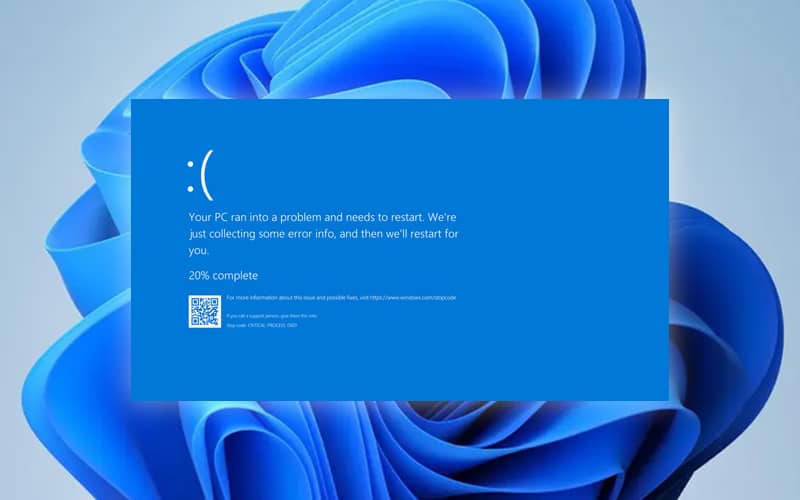
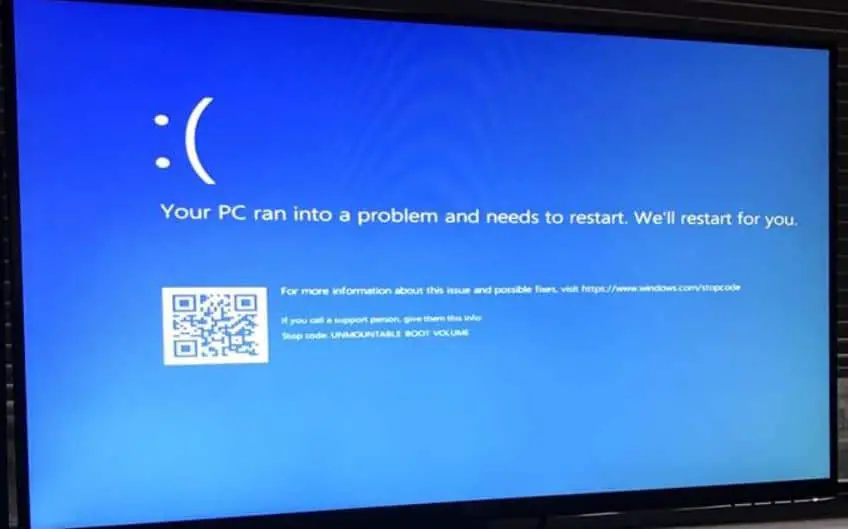
Encountering a "Windows did not load correctly" error message on a Windows 11 system can be a frustrating experience, interrupting productivity and causing concern. This error message indicates a problem with the boot process, preventing the operating system from loading successfully. This guide provides a comprehensive understanding of the causes, potential solutions, and preventive measures for these boot errors.
Understanding the Causes
The "Windows did not load correctly" error message can stem from a variety of factors, each requiring a specific approach to troubleshooting. Common causes include:
- Hardware Issues: Defective or failing hardware components, such as the hard drive, RAM, motherboard, or power supply, can disrupt the boot process.
- Software Conflicts: Incompatible or corrupt drivers, outdated software, or malware infections can interfere with the operating system’s ability to load properly.
- System File Corruption: Crucial system files, essential for the boot process, can become corrupted due to power outages, improper shutdowns, or software errors.
- Boot Configuration Errors: The Boot Configuration Data (BCD), responsible for managing the boot process, can become corrupted or misconfigured, leading to boot errors.
- Disk Errors: Damaged sectors or file system errors on the hard drive can hinder the operating system’s ability to access necessary files.
- Incorrect Boot Order: Improperly configured boot order in the BIOS/UEFI settings can prevent the system from finding and loading the operating system.
Troubleshooting Strategies: A Step-by-Step Approach
When encountering a "Windows did not load correctly" error, a methodical troubleshooting approach is essential to identify the root cause and implement the appropriate solution. Here’s a comprehensive guide:
1. Check for Hardware Issues:
- Power Cycle: Begin by restarting your computer. This often resolves temporary glitches.
- Inspect Hardware: Visually inspect hardware connections, ensuring all cables are securely plugged in.
- Run Hardware Diagnostics: Utilize the built-in diagnostics tools provided by your motherboard manufacturer or run third-party hardware diagnostic software to check for faulty components.
- Replace Faulty Components: If hardware diagnostics identify a failing component, replace it with a known working alternative.
2. Troubleshoot Software Conflicts:
- Safe Mode: Boot into Safe Mode, which loads the operating system with minimal drivers and software. This can help identify if a specific driver or program is causing the error.
- Recent Software Changes: Consider uninstalling recently installed software or drivers, as they may be the culprit.
- Run System File Checker (SFC): The SFC tool scans for and repairs corrupted system files. Open Command Prompt (Run as administrator) and type "sfc /scannow".
- Run Disk Cleanup: Remove temporary files and unnecessary data to free up disk space, potentially resolving file system conflicts.
3. Repair Boot Configuration Errors:
- Boot Repair Tools: Windows 11 includes built-in boot repair tools accessible through the Advanced Startup Options. Select "Troubleshoot" > "Advanced options" > "Startup Repair" or "Automatic Repair."
- Use a Recovery Drive: If the built-in tools fail, create a bootable USB drive with the Windows 11 installation media. Boot from the drive and choose "Repair your computer" to access advanced troubleshooting options.
- Manually Rebuild BCD: For more experienced users, manually rebuilding the BCD can be achieved using the command prompt within the recovery environment.
4. Address Disk Errors:
- Run Check Disk (CHKDSK): This command-line tool checks for and repairs disk errors. Open Command Prompt (Run as administrator) and type "chkdsk /f /r".
- Defragmentation: Defragmenting the hard drive can improve performance and address file system fragmentation issues.
- Disk Management: Utilize the Disk Management tool to check for disk errors, partition issues, or corrupted file systems.
5. Correct Boot Order:
- Access BIOS/UEFI Settings: Enter the BIOS/UEFI settings by pressing the appropriate key during the boot process (usually F2, F10, or DEL).
- Configure Boot Order: Locate the Boot Order settings and ensure the hard drive containing the Windows 11 installation is listed as the primary boot device.
6. Additional Troubleshooting Steps:
- Update BIOS/UEFI: Ensure your motherboard’s BIOS/UEFI firmware is updated to the latest version.
- Disable Fast Startup: Fast Startup can sometimes lead to boot issues. Disable it in the Power Options settings.
- Scan for Malware: Run a full system scan with a reputable antivirus program to rule out malware infections.
FAQs
Q: What should I do if the "Windows did not load correctly" error persists?
A: If the above troubleshooting steps fail to resolve the issue, consider performing a clean installation of Windows 11. This will erase all data on the hard drive, so ensure you have a backup.
Q: Can I recover my data if I need to reinstall Windows 11?
A: Yes, you can recover your data from a backup if you have one. Alternatively, you may be able to recover data using data recovery software.
Q: How can I prevent "Windows did not load correctly" errors in the future?
A: Here are some preventive measures:
- Regularly Backup Data: Create regular backups of your important files to safeguard against data loss.
- Keep Software Updated: Install the latest updates for Windows 11, drivers, and software to ensure compatibility and security.
- Perform Regular System Maintenance: Run Disk Cleanup, defragmentation, and system scans to maintain system health.
- Monitor System Health: Use performance monitoring tools to track system resources and identify potential issues.
Conclusion
The "Windows did not load correctly" error message can be a frustrating obstacle for Windows 11 users. However, by understanding the potential causes and following the troubleshooting steps outlined in this guide, users can effectively diagnose and resolve the issue. Regular system maintenance, software updates, and data backups are crucial preventive measures to minimize the risk of encountering such errors in the future.

![Fix the Windows 11 second boot error [Quick guide] – Micro Technologies](https://cdn.windowsreport.com/wp-content/uploads/2022/03/health-check.jpg)


Closure
Thus, we hope this article has provided valuable insights into Troubleshooting Windows 11 Boot Errors: A Comprehensive Guide. We thank you for taking the time to read this article. See you in our next article!